INTRODUCTION: Although I have made a clone of Jennings Cocker Hoop at least once before, I have never brewed it using all green hops. Cocker Hoop is a rich, creamy, gold coloured Bitter with good hop appeal. Good hop aroma with fruit notes. Initial complex taste of hop, fruit and malt followed by a refreshing hoppy and bitter finish.
The late-summer hop harvest, and the spicy-grass, earthy aromas which make green-hopped beers so unique, struck me as being a good excuse to use all green hops in the recipe.
ABOUT THE RECIPE AND INGREDIENTS: The recipe I am using is one derived from Graham Wheeler in his book “Brew Your Own British Real Ale” 3rd edition 2009. Graham unfortunately passed away in November 2017, but he wrote many great home brewing books that are still readily available. His recipes of well-known commercial beers were based on considerable research. Although simplified for home brewing, they always produce excellent results.
Let’s first talk about the hops. Graham’s recipe and the original Jennings one, calls for the use of Styrian Golding hops and Challenger hops. However, the hops I was going to use were of the Goldings and Cascade variety. As these hops were ‘green’ and full of moisture, I had to use eight times as many hops as normal to get the bitterness and aroma right. The green hops were very kindly given to me from a friend who grew them in his garden.
Turning to the malts in the recipe, the malt bill is relatively simple consisting of Pale Malt, Torrified Wheat, and a small amount of Black Malt.
The Pale Malt I am using is Maris Otter from Warminster Maltings. Maris Otter is considered a very “malty-tasting” pale base malt, which has made it a favourite among traditional cask ale brewers for decades. Using Maris Otter, brewers are able to create beers of relatively low gravity and alcoholic strength, such as “ordinary” bitters, while retaining a genuinely malty flavour profile.
Torrified Wheat has been heat treated (kind of “popped”) to break the cellular structure, allowing for rapid hydration and allows malt enzymes to more completely attack the starches and protein. Torrified Wheat can be used in place of raw wheat in Belgian style Wit-Beers, also very good for adding body and head, especially to English ales. Since it has not been malted, you can’t sub it for malted wheat. Because it’s not malted, it needs to be mashed with diastatic pale malt in order to convert the starches to sugars ready for fermentation.
The black malt is used in very tiny quantities in this recipe and is there merely to provide colour to the beer. Used in small amounts a likely very yellow beer can be turned into light amber without affecting the desired malt flavour outcome.
One of the extra fermentables I am using this time is #1 Brewer’s Invert Sugar. Invert Sugar is a brewing adjunct (unmalted source of fermentable extract). It is manufactured by converting sucrose (derived from cane or beet sugar) with either acids or enzymes to produce a mixture of glucose and fructose. It is called invert sugar because the sugar solution before the conversion (called inversion or hydrolysis) rotates the plane of polarized light in one direction and following inversion rotates the solution in the opposite direction. Fructose and glucose are monosaccharides and are rapidly used by brewer’s yeast strains. Brewer’s invert sugars can lend beers unique caramel flavours that are particular to many British bitters and other ales. They are delicious to nibble and not surprisingly, you end up picking off little bits to eat before you put the sugar in the boil!
MASH: 5.5 kg Maris Otter Pale Malt (Warminster) 7 EBC (85.5%) 0.60 kg Torrified Wheat (Crisp) 4 EBC (9.4%) 0.06 kg Black Malt (Crisp) 1300 EBC (0.9%) Mash pH 5.45
BOIL: 100 min boil 320 g Cascade green leaf hops (1-2.0% alpha) – added during boil, boiled 60 min (25 IBU) 130 g Golding green leaf hops (1-2.0% alpha) – added during boil, boiled 60 min (10 IBU) 150 g Golding green leaf hops (1-2.0% alpha) – added during boil, boiled 10 min (4.3 IBU) 250 g Ragus Brewer’s Sugar #1 – added during boil, boiled 20 mins 1 Protafloc Tablet (Irish moss) – added during boil, boiled 15 min 0.27 g Yeast nutrient – added during boil, boiled 10 mins 5g Polyclar Brewbrite added during boil, boiled 10 mins.
Add 200mg potassium metabisulphite to 45 litres water to remove chlorine / chloramine.
Water treated with brewing salts for a hoppy flavour profile: Ca=110, Mg=18, Na=16, Cl=50, SO4=275).
5 L/kg mash thickness.
Single infusion mash at 66C for 90 mins.
Raise to 76C mashout temperature and hold for 15 mins.
Fly sparge 5.8 L water with 5.6-5.8 pH (measured at mash temperature). Collect 39.79 litres.
Boil for 90 minutes, adding Protafloc, invert sugar, and hops per schedule. Add hopstand hops at boil end. Start chilling after 15 mins.
Cool the wort quickly to 20C (I use a one-pass convoluted counterflow chiller to quickly lock in hop flavour and aroma) and transfer to fermenter.
Aerate well. I use pure oxygen from a tank at a rate of 1 litre per minute for 90 seconds per 19 litres.
Pitch yeast and ferment at 20C (wort temperature).
Before packaging you may optionally crash cool to around 6C and rack to a bright tank that has been purged with CO2 to avoid oxygen pickup. Add 1 tsp of unflavoured gelatine dissolved in a cup of hot distilled water per 19 litres of beer, and allow to clear for 2-3 days.
Package as you would normally. I rack to cornie kegs that have first been purged with CO2, and then carbonate on the low side (around 2 volumes of CO2) to minimize carbonic bite and let the hop and malt flavours shine through. After 1-2 weeks at serving pressure the kegs will be carbonated and ready to serve. Like all hop forward beers this beer is best consumed fresh, so feel free to raise the CO2 pressure temporarily to 30-40 PSI to carbonate fast over a 24 hour period, and then turn back down to serving pressure.
As the planet moves towards record temperatures and greenhouse gases spiral, the Campaign for Real Ale (CAMRA) has launched a new campaign; it is called “Drink Greener”. It began last year after a hard look at how the beer and cider industry impacts on the environment. It started during the lockdowns and restrictions and in the run up to the COP26 summit last November. As part of this review, CAMRA formed the “Environmental Working Group”, which consists of CAMRA members chosen for their knowledge and expertise in environmental issues. The Group has been analysing the practices within the ale and cider industry and its effects on our wider climate. I was asked to join the Group based on my pre-retirement occupation as the Head of Environment of a large national organisation.
Innovative industry solutions are already in place and are increasing, while others have been around for a long time. Brewers have long been donating their used, fermented grains to farmers to use as animal feed. Used yeast ends up as Marmite! Ways to use less water and heat in the brewing and fermenting process are also being adopted. All this is reducing their carbon footprint, but there is still some way to go before they can be truly carbon-neutral or even carbon-negative. So, for now, the emphasis is on the “er” in “Greener”, rather than drastic overnight changes.
One thing the Environmental Working Group wants to celebrate is the “green” practice of re-use already happening in bars and pubs everywhere. And it has been happening unnoticed for centuries! What is it that’s so special about the pub? Let’s compare buying a pint of beer or cider in the supermarket with buying a pint of beer or cider in the pub. If you buy a bottle of beer, you will pour it into a glass (probably), and pop the empty bottle, (hopefully) into the recycle bin. You’ve done your bit for the environment, right?
The statistics and logistics that surround recycling are complex and varying. It is difficult to understand how much glass is actually being recycled. Glass is infinitely recyclable, but according to British Glass only around 50% of household glass gets made back into useable form. The other half is recycled as aggregate, incinerated, or ends up in landfill.
Let’s imagine you are walking into your local pub, firstly you would be enjoying the pub’s warmth and light which is benefitting multiple people. Then if you were having a real ale or real cider, it will be served to you in a reusable vessel, (a glass), straight from the cask, cutting out the “middle bottle”. The empty casks are taken back to the brewery to be washed, sterilised and reused for the next batch of beer, which will find its way back to the pubs and clubs. The process starts all over again, creating a closed loop where the emphasis is on re-use rather than recycle. The pub’s waste bottles will almost definitely end up being recycled, as their recycling rubbish collection has a lower charge than their rubbish destined for landfill, so it makes sense for the pubs to sort their rubbish out properly.
Producers of real cider and perry have a lot to be proud about too, as those drinks are usually made in the time-honoured way. The process of cold pressing fruit such as apples and pears and letting the juice ferment naturally is centuries old and incredibly good for the environment. So good, in fact, that there is a government funded scheme to create and conserve community orchards. The benefits are tangible as humans maintaining them can enjoy the beauty of being outside connecting with nature, tradition and provenance while the birds, bees, butterflies and other insects revel in the flowers and fruit.
Current generations have found themselves living in a time where the planet is warming, and the potential consequences are dire. How we live our lives has changed dramatically in the past two or three decades; will we be able to halt the damage that we have caused? We have to believe that we can, and that the earth can heal, or we might as well all give up. Re-using to eliminate waste, rather than creating waste then justifying it by recycling it, has surely got to be the way. Remember the milkman? He was once buzzing around in an electric vehicle long before they became fashionable, and giving us milk in reusable bottles. Cost must have been the main reason for sacrificing convenience in favour of those plastic cartons, which are recyclable, but non-bio-degradable and not reusable in an industrial sense. The milkman hasn’t completely disappeared yet, you can still catch him, or her!
So, you see, you really can help save the planet just by going to the pub. How good is that? We love beer, we love cider, and we love our planet. It’s amazing. After all, as they say, it’s the only planet with beer on it (as far as we know!).
Named after Robinsons’ brewery cat, Old Tom is almost as old as the brewery itself. Brewed since 1899, it is recognised, both nationally and internationally, as one of the most famous strong ales, winning some of the industry’s most prestigious awards including World’s Best Ale.
Old Tom is dark, rich and warming with a cherry brandy like colour and character. This strong ale has a booming balance of ripe malt, and peppery hops combined with roasted nut and chocolate flavours with a smoky richness. A distinctive deep port wine finish with bitter hops balance complemented by heady, vinous aromas of dark fruit.
Conventional whole grain brewing traditionally uses three vessels: a Hot Liquor Tank (HLT) for heating up the brewing and sparging water; a Mash Tun (MT) to extract the sugars from the grain and create the wort; and a Boil Kettle (BK) to boil the wort with the hops. My three vessel (3V) system uses two 75 litre and one 100 litre stainless steel pots. So as you can imagine, this means three pots to set up and three pots to clean.
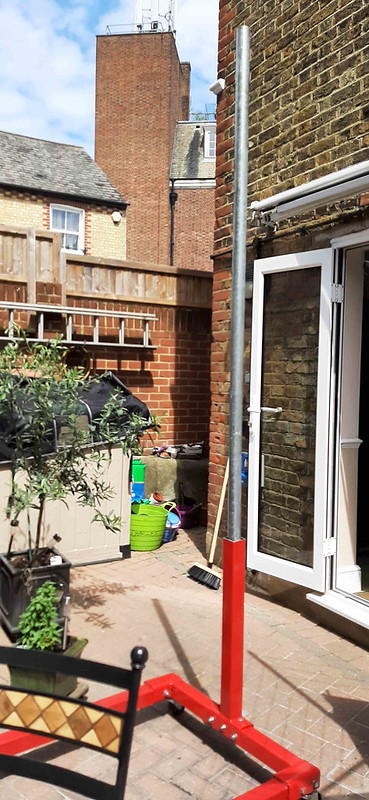
As I store all my brewing gear in the loft, it also means three pots to hoist down and carry out to the gazebo that I erect in the garden to use as my brewery. So to make this an easier brewing day for me, on this occasion I am using my Speidel Braumeister 50 litre one-pot brewing machine (BM). The BM is a ‘pot within a pot’, the inner pot being used as a type of mash tun called a ‘Malt Tube’. The malt tube contains the grain and is raised after mashing and sparging, leaving the wort behind inside the larger pot for boiling. However, with large grain loads the malt tube can be extremely difficult to lift and remove. This time in using my BM I am using a new home made crane to do the lifting for me – I described how I built the crane in a recent brewing blog article.
More on using the crane later, including a video of it in use. However, to help contain your excitement, here’s a picture of the crane and the BM all set up and ready to go:
Crane and BM
I did say that the BM is a one pot brewing system, and normally in using it you would use a no-sparge method of mashing. One of the things that make the no sparge method so simple is that you use the full volume of brewing liquor (treated water) in the mash, which makes adding minerals and acids easier for those of us who tweak our water profiles, as you’re not calculating mash and sparge additions. However, in practice I have found that sometimes your water quantity calculations can be slightly out and more treated water at the right temperature is needed. Additionally, a small supply of instant, nearly boiling water can be useful for rinsing and sterilising pumps and cooling coils. So when I use my BM, I also use my small HLT which contains 11 litres. I made this from a Baby Burco stainless steel 10 litre catering urn and here is a picture of it with recirculating hoses attached.
11 Litre HLT
One thing that is always a concern when brewing is safety. Particularly as you are using very hot water and electricity to heat it. Electric pots mean lots of electric cables to heat the elements. There are also cables attached to the pots that link to temperature controllers. Finally, the electric pump I use for liquid transfer has a cable. All these cables dangling along the ground and each running to a power supply can be a trip hazard. You do not also want to dart here and there to switch things on and off. To manage the power supply for the pots, pumps and temperature controllers I use a homemade control panel. This has a single 30 amp power supply going in, and the power to the various items runs from this via on-off switches. Temperature control of the HLT is also done from this control panel. Much safer and only one power cable running to a 35 amp weatherproof Commando socket in the garden. The control panel also contains a timer and relays to help control the brewing processes. Here’s a picture of it:
Control Panel
ABOUT THE INGREDIENTS
Fermentables
The main ingredient of this recipe should be Pale Malt, such as Maris Otter. As I found myself with no stock of this, I am using a combination of Baird’s Vienna and Munich Malts to get the right maltiness profile. Vienna malt is a well-modified lager malt with an elevated malt colour to add character and toastiness to beers, in particular darker lagers. It can be used as 100% of your grist but more commonly used to add body, mouth-feel, and toffee flavours to lager beers. Munich malt is a darker version of Vienna Malt and is the highest coloured version of true malts that can still be used as a base malt. Munich has more pronounced rich toasty flavours and is ideal for dark ambers, milds, and brown ale beer styles. During the final phase of Munich production, modification continues during kilning so that the very high finishing temperature lends itself to the mouthfeel of a beer.
The recipe needs a decent amount of Crystal Malt and for this I am using Dingeman’s Special B. This is the darkest of the Belgian crystal malts. Through its unique double drying process, Special B has a unique aroma and flavour. The Special B imparts a heavy caramel taste and is often credited with the raisin-like flavours of some Belgian Abbey beers. It can substitute Chocolate and black malt when bitterness is not desired.
Chocolate Malt is used in equal proportions to the Crystal Malt. The Chocolate Malt I am using comes from Simpsons and gives the beer a stunning dark brown colour. Chocolate overtones and hints of coffee bring richness and complexity at higher usages in Stouts and Porters.
Picture of the grains before and after milling are show below:
Grain mix
Grain milled and ready
Old Tom is a high gravity beer with a dry finish, and so the final fermentable I am using is sugar. Not ordinary cane sugar, but Ragus Brewer’s Sugar Number 1. This is produced as a fully inverted glucose/fructose mixture seeded into a crystalline block. It’s 95% readily fermentable, with a subtle colour and mellow flavour. It’s used in brewing lager and pale ale. It’s fudge-like in appearance and easy to cut what you need from the block, as shown below:
Invert # 1 sugar
Yeast
The yeast used on this occasion is “LALLEMAND Nottingham – High Performance Ale Yeast”. Nottingham is an English style ale yeast used for a wide variety of styles and fermentation conditions. Traditional styles brewed with this yeast include, but are not limited, to Pale Ales, Ambers, Porters, Stouts and Barley wines. In addition to these traditional styles, Nottingham can be used to produce Golden Ale, Kölsch, Lager-style beers, IPA, and Imperial Stout, among many others. Nottingham is a relatively neutral ale strain that is stress tolerant making it a good choice for high gravity, sour and other challenging fermentation conditions.
Nottingham yeast
Hops
This is an English old type barley Wine, so traditional English hops work best when making this beer style. I have used Whitbread Goldings Variety (WV) and Fuggle. WGV has a distinctive and robust flavour and although Goldings features in its name, it is more likely to have had a Fuggle pedigree based on its Farnasene content (Farnesene is a component of the hydrocarbon fraction of hop oil). Fuggle is revered as the classic English aroma hop and is often used in conjunction with Goldings. It can be used as a main copper hop and is also used for dry hopping. The Fuggles I have used are from my CAMRA colleague Bob Keaveny that were grown locally in his ‘hop garden’ and harvested in September 2020.
The recipe details now follow.
ROBINSON’S OLD TOM – RECIPE DETAILS
All grain recipe with no sparge. I used my Speidel 50L Braumeister to brew this beer, so the figures below relate to my particular set up and should be adjusted as necessary to your own equipment requirements.
Vitals:
Size: 29 Litres (post-boil hot)
Batch volume into fermenter: 25 Litres
Mash Efficiency: 86 %
Attenuation: 76.4%
Calories: 88.0 kcal / 368.3 kJ per 100ml
Original Gravity: 1.090 (style range: 1.085 – 1.120)
N.B. Percentage of fermentables in mash excludes sugars.
Mash water 44 litres. Mash volume 51 litres (water + grain). 55 litres total water (11 litres in HLT).
Mash pH 5.47
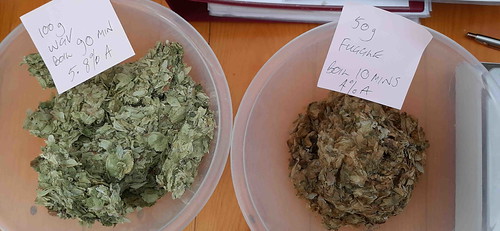
Boil:
100 g WGV Hops (5.8%) – added during boil, boiled 90 min (45.6 IBU)
50 g Fuggle Hops (4.0%) – added during boil, boiled 10 min (5.4 IBU)
0.5 Protafloc Tablet (Irish moss) – added during boil, boiled 15 min
0.25 g NBS Yeast Nutrient – added during boil, boiled 10 min
7 g Polyclar BrewBrite (finings)- added during boil, boiled 10 min
Post boil:
675 g Invert Sugar #1 30 EBC (7% of total fermentables). Pre-dissolved in small amount of the boiling wort and stirred into beer in fermenter before pitching yeast.
Yeast:
4 packets of Imperial Nottingham Yeast
(Rehydrate yeast as follows: 400ml of boiled, cooled water at 30-35C; sprinkle yeast; wait 15 mins; stir briefly; let sit 5 mins; swish round and pitch. Roughly 598 billion yeast cells)
Bottling/kegging stage:
100 g of table sugar dissolved in a little boiled water and added to bulk in bottling bucket.
NOTES / PROCESS
Add 300mg potassium metabisulphite to 55 litres tap water to remove chlorine / chloramine.
Water profile Randy Mosher Pale Ale modified: Ca=110, Mg=18, Na=16, SO4=100, Cl=50. SO4/Cl ratio 2.1.
4.5 L/kg mash thickness with no sparge.
Single infusion mash at 66C for 90 mins.
Raise to 77C mashout temperature and hold for 15 mins.
Boil for 90 minutes, adding Protafloc, etc., as per boil schedule. Lid on at boil-out, whirpool with large spoon or paddle and allow to settle. Start chilling immediately.
Whilst wort is boiling, draw off about 500 ml in a plastic jug and dissolve the 675 g of invert sugar.
Cool the wort quickly to 20C (I use a one-pass convoluted counterflow chiller to quickly lock in hop flavour and aroma) and transfer to fermenter.
Stir previously dissolved invert sugar mixture into fermenter.
Aerate well. I use pure oxygen from a tank at a rate of 1 litre per minute for 90 seconds.
Pitch yeast and ferment at 19-21C (wort temperature).
After the beer has fermented to near final gravity the beer is raised from fermenting temperature to a higher temperature roughly 1-2 degrees C above the original fermentation temperature and allowed to sit for two to four days for a diacetyl rest. Assume fermentation is done if the gravity does not change over 3 days.
Before packaging you may optionally crash cool to around 6C and rack to a bright tank or bottling/kegging vessel that has been purged with CO2 to avoid oxygen pickup. Leave tightly covered for two days to clear.
Gently stir-in bulk priming sugar.
Package as you would normally. I racked 8.5 litres to a 9L cornie keg that has first been purged with CO2, and into 40 X 330ml Steinie bottles. After 1-2 weeks at serving pressure the keg will be carbonated and ready to serve. The bottles should be stored two weeks at room temperature, then moved to a cool room for one week.
COMMENTARY WITH PICTURES AND VIDEO
To start with, here’s a picture of the “Head Brewer” at work in the ‘brew-gazebo’:
Master Brewer at work!
To make sure that you get an even flow of circulating mash liquor, I always make sure the BM is set level on its adjustable stand.
Getting the BM level
Adding the grains to the liquor (treated water) in the BM malt tube for mashing:
Adding the grain
I always find it hypnotising as the malt liquor starts recirculating during the mashing process:
After adding the grain and waiting about 20 minutes, the mash pH measurement is taken. In this case it was in the acceptable range without the need for any additional treatment salts:
pH reading of mash
Once the mash is over, the malt tube is raised and the wort heated to boiling. I know you were all eager to see this, so here’s the crane operating – so easy and effortless!
Of Course, after draining the malt tube has to be completely removed ready for boiling, so here’s another exciting crane video for you:
Don’t you just love my crane?
As the wort is heating up for boiling I get the hops ready:
WGV & Fuggle hops
A nice rolling boil is what we are after:
Boiling away
Once the boil is over, the wort is whirlpooled and left to settle. This is the time to set up the hoses and Counter Flow Chiller (CFC) ready for chilling. The hoses and their correct connections can be a bit of a nightmare, so care is needed!
Snakes everywhere!
Here we are running off the cooled wort into the Grainfather Conical fermenter:
Transferring finished wort into fermenter
The connections to the CFC are clearly shown in this picture:
Connections on CFC
The CFC is brilliant at dropping the hot wort at around 90C down to the 20C needed in the fermenter. Fortunately, my ground water temperatures are quite low in comparison. The small dial shows the ground water temperature in and the large dial the wort temperature out:
Ground water & wort temperatures
This is what is left in the BM after the wort has drained off the hops:
Spent hops after boil & drain
The Nottingham yeast is a very quick starter and after a day this is a peek inside the fermenter with the yeast cells chomping away at the sugars:
Fermenting away
The conical fermenter is stored in my cool room, which is really a converted under-stairs cupboard. Here I can connect it up to my converted Maxi pub shelf coolers. This gives me very fine control over the fermentation temperature. Looks a bit like a Dalek!
Fermenter in cool room
After about 7 days, the finished beer is transferred to the bottling/kegging bucket ready for final packaging.
Ready for bottling & kegging
CONCLUSION
Another successful brewing day completed. All I have to do now is to let it mature in the bottles for 3 or 4 months and it will be ready to imbibe at Christmas, although I suspect one or two sample bottles will be downed before then!
This recipe was derived from a book written by Graham Wheeler. He describes the beer as “A full bodied dark beer with malt, fruit and chocolate in the aroma. A delightfully complex range of flavours includes dark chocolate. Full maltiness, port and fruit tastes lead to a long, bittersweet aftertaste.” I will let you know if he was right!
The Speidel Braumeister (BM) was specially developed for the active home brewer. The entire brewing process takes place in a single container and is controlled by a fully automatic Wi-Fi control. However, in spite of its compact size it does have its drawbacks. Those of you who own a 50 litre BM will know how difficult it is to lift the malt tube after the mash process without some lifting aid. The saturated grain weight, plus the suction effect, means you may have to lift the equivalent weight of perhaps 30 kg or more.
In the past I have used a standard engine hoist to do this. It is very effective, but perhaps a little ungainly, and requires manual pumping of the hydraulic piston. It was also awkward to manoeuvre as the legs were in a ‘V’ shape and were a tight fit around my BM stand.
My old engine hoist
In my own particular brewing circumstances, I have no dedicated brewing room or garage area. All my brewing is done in my ‘Brew-gazebo’, which is erected in my small patio garden every time I do a brewing session. So I have the additional problem of breaking down the engine hoist after use into its 8 components to store it away.
In seeking an alternative that offers a more easy to use method without any manual effort from me, plus a smaller floor profile, I came across another type of engine maintenance equipment called a Gearbox/Engine Stand. The Gearbox/Engine Stand has 4 wheels, 570 kilos capacity, and is suitable to hold most engines and gearboxes so that a mechanic can work on them.
Gearbox/Engine stand
I liked the way that the ‘U-shaped’ legs would conveniently fit either side of my custom made BM stand. All I needed was a way to convert this engine stand into some kind of lifting arrangement. As for the hoisting mechanism itself, some time ago I bought a 500W electric hoist from Lidl’s as it was going cheap, so I could now at last put it to good use. All I needed to do was to work out a way to add some sort of upright jib and a hoist support arm to act as a crane of sorts. So here is a picture of some of the bits ready to assemble.
Electric hoist
The first thing I did was to use a reciprocating saw to remove the engine/gearbox mounting plate.
Mounting plate chopped off
I now reckoned that the hole was just the right size to take a 48mm standard scaffold pole. After working out the required clearance height needed for the raised malt tube, I bought a 2.5M galvanised steel scaffold pole. Sure enough, it was a perfect fit and slotted in nicely.
Jib pole in position
Next I looked at support arms and came up with a vidaXL Hoist Frame 600kg Industrial Garage Lifting/Jacking/Hoist Crane Derrick. I like the way the brackets fitted to a scaffold pole, and it can easily be removed from the pole by simply tapping out the round hinge inserts. Plus, it was a nice bright red to match the gearbox/engine stand!
The hoist arm
Here’s a picture of how the finished hoist now looks.
New hoist in operation
Really pleased with how this works. Once assembled, it fits into the Brew-gazebo nicely. Effortless lifting of the malt tube at last!
Look out for my brewing session in next month’s Bromley CAMRA e-Newsletter to see it in action, when I will be brewing a Robinson’s ‘Old Tom’ clone.
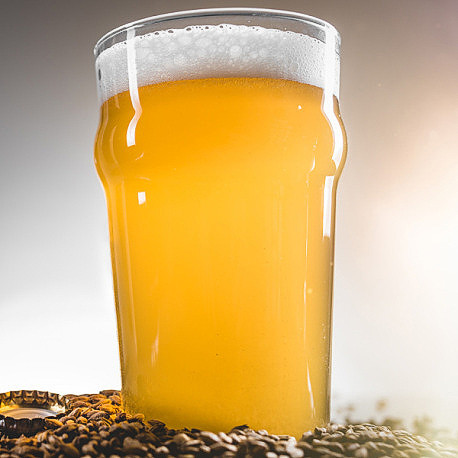
When you think about an Oatmeal Stout, you normally expect this in your glass:
But for something completely different, what about an Oatmeal Stout that looks like this:
Until a year or so ago, I had not heard about these new, niche beers, but they have become quite popular to make amongst the small craft brewers and I expect we will see more of them. The colour of a traditional oatmeal stout comes from the roasted malt, which also gives stouts their infamous roasted character in aroma and taste. As for gold coloured stouts, is it really a stout if the barley isn’t roasted?
Golden Stouts, as the name suggests, are beers that pour a golden colour and yet have all the traditional aromas and flavours associated with dark stouts, those trusty workhorses of the beer world that span the colour spectrum from ruby to brown to cola to pitch black. Typical stout flavours include chocolate and coffee with lesser contributions of caramel and nuttiness as well as hints of toffee and fruit. In regular stouts, be they Dry Stouts like Guinness, Imperial Stouts like Courage Imperial Russian Stout, or Oatmeal Stouts like Samuel Smith’s, the chocolate and coffee flavours are owed to the dark malts that are used. Heavily roasted malts impart all the coffee and chocolate we could ever want. Malts also impart colour to the beer. Thus, a style like stout whose characteristics are inextricably linked to these dark malts will, by definition, be dark in colour, right? Well, Golden Stouts would argue otherwise.
In this sense, it is useful to think of Golden Stouts as a thought experiment born into reality. Some intrepid brewers wanted to challenge themselves to see if they could create a beer that was golden yet tasted like the darker beers we’ve come to know and love. It’s a fairly simple brewing process, really. Brewers making a golden stout simply omit the darker malts in the grain bill. They can still include lighter malts that will offer flavours of toffee, caramel, and nuttiness. To replicate the chocolate and coffee flavours missing from the now-omitted dark malts, brewers add actual chocolate and coffee. Vanilla can be added as well for additional flavour. These actual adjunct additions will provide flavour and aroma without affecting the colour. Golden Stouts are a brewery sleight-of-hand, so to speak. They’re a great way to create some cognitive dissonance in yourself or others. Our brains are programmed to expect a certain range of flavours when we see golden beers and golden stouts mess with these neural pathways. You may very well have to drink a few before your brain comes around to it.
Since the concept of golden stouts seems to have gained some traction and won’t be consigned to the dustbin of history in the immediate future, I thought it high time I experienced this enigma and attempted to brew one.
ABOUT THE INGREDIENTS
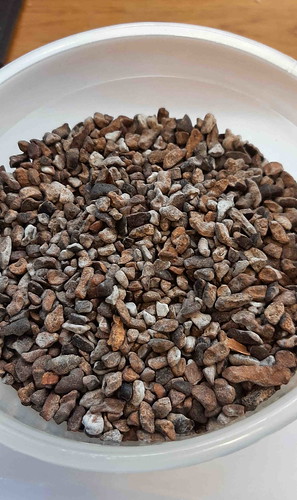
Fermentables The backbone of this recipe is Maris Otter Pale Ale Malt from Warminster Maltings, Britain’s oldest working maltings. Situated in the Wiltshire town of the same name, on the western tip of Salisbury Plain, the Pound Street maltings has been continuously making malt for the brewing industry since 1855. Not only that, in defiance of all the 20th century technology which completely overwhelmed the malting industry in the 1960’s, Warminster Malt is still made the traditional way, by hand, on floors, almost totally unchanged from the day the maltings was originally commissioned. Maris Otter barley was first introduced to British farmers, maltsters and brewers in 1965, and has endured for half a century.
Warminster Floor Maltings
A little Munich Malt is added to this recipe and is often used in Oatmeal Stouts. Munich malt is a well-modified lager malt which is kilned in such a way that modification continues during kilning and very high finishing temperatures are used to produce the characteristic colour and malty flavours. Munich has more pronounced rich toasty flavours and is ideal for dark ambers, milds, brown ale beer styles.
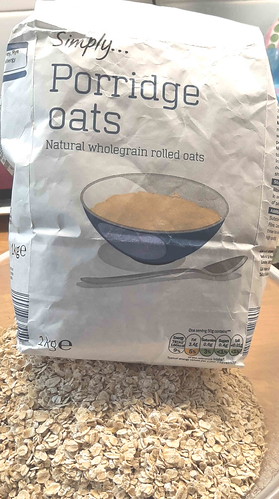
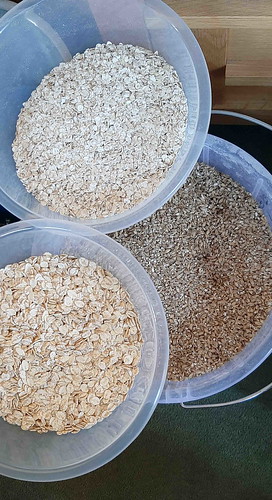
As the name of Oatmeal Stout suggests, oats are used in this recipe. Oats are wonderful in a porter or stout. Oatmeal lends a smooth, silky mouthfeel and creaminess to a stout that must be tasted to be understood. Oats are “flaked” by rolling them between two hot rollers, heating them sufficiently to gelatinize the starch during the process. They are also called “rolled” oats because of the rollers used in the process. There may be some difference in the quality, cut, and final size between what you see at the homebrew store and the grocery, but they are fundamentally the same product. In my case, I chose my local Lidl store for the rolled oats as they were a good price and of known quality.
Rolled Oats
Flaked barley is another ingredient you often find in oatmeal stouts. Flaked Barley is steam treated to soften them prior to passing through rollers. This process of part gelatinisation and flaking aids the mashing liquor to access the endosperm and negates the need to mill the product. Added in up to 10% of the total grist, Flaked Barley is used to add unfermentable saccharides in the brewing process. This increases the attenuation limit, while also adding high molecular weight protein for head retention, as well as greater body and turbidity. Flaked Barley gives a grainy bite to beers. I didn’t have any flaked barley in my inventory at present, and with deliveries currently so unreliable, I popped across to my local Holland & Barrett health food shop to get what I needed.
Flaked Barley
The last fermentable ingredient I am using is Panela Sugar. Panela, also known as picadillo or jaggery, is an unrefined, non-centrifugal, dark brown cane sugar pressed into blocks or cones. Once set, it can be pulverised to make it easier to dissolve. It contains higher levels of molasses and natural minerals than ordinary refined sugars. As well as increasing attenuation of the beer and lightening the body, this sugar imparts a rich caramel flavour.
Panela Sugar
Special flavouring ingredients As already stated, a Golden Oatmeal Stout gets the roast coffee and chocolate flavours from using dark grain substitutes. The way I did it was to create separate coffee and chocolate tinctures using cheap vodka. These tinctures can be added after primary fermentation, individually measured out into bottles, or added at the bulk bottling/kegging stage (or added to the Bright Tank if you use one). To create a coffee tincture, soak crushed beans in vodka. They only need to be crushed, as you don’t want any fine grounds sneaking into bottles. You’ll want to leave the beans in the vodka for 7 – 14 days to ensure complete extraction. Next you’ll want to strain out the beans so you’re able to add the extract freely. The same process is used for the Cacao Nibs.
In my recipe I also used two vanilla beans to lend a nice smooth vanilla background flavour. Take the beans, cut the ends, split it down the middle and scrape them down a bit to rough up the insides. Scrape the “caviar” from them, and then cut them into rough 1 inch bits after that. Put it all in vodka, enough to cover them and seal it up in a glass jar for 14 days. Toss the whole lot into the beer through a strainer at the same time as the coffee and cacao.
Roast Cacao Nibs
Vanilla Beans, Shredded And Steeped In Vodka
Lidl’s Roast Coffee Beans
Yeast The yeast used on this occasion is “Imperial A09 Pub”. Brewers swear by this strain to achieve super bright ales in a short amount of time. One of the most flocculent brewer’s strains around, Pub will rip through fermentation and then drop out of the beer quickly. Pub produces higher levels of esters than most domestic ale strains, making it an excellent choice for when balance between malt and yeast derived esters is necessary. Beers made with Pub need a sufficient diacetyl rest when main fermentation is finished.
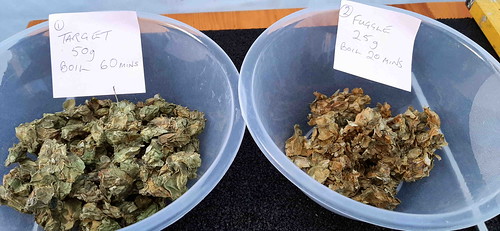
Hops An oatmeal stout is an English creation, so English hops work best when making this beer style. Examples include East Kent Goldings, Fuggles, Northern Brewer, and Target. Aim for 25-40 IBUs. Hop flavour and aroma are usually minimal or non-existent, but if present they should not dominate the flavour of the final beer, so use restraint in the late hop additions. I am fortunate to still have some fine hops from my CAMRA colleague Bob Keaveny that were grown locally in his ‘hop garden’. So, in my recipe I have used Target as the bittering hop and Fuggles as a late addition aroma hop.
The recipe details now follow.
GOLDEN OATMEAL STOUT– RECIPE DETAILS All grain recipe with no sparge. I used my Speidel 50L Braumeister to brew this beer, so the figures below relate to my particular set up and should be adjusted as necessary to your own equipment requirements.
Vitals: Size: 32.5 Litres (post-boil hot) Batch volume into fermenter: 27 Litres Mash Efficiency: 81 % Attenuation: 79.6% Calories: 52.5 kcal per 100 ml Original Gravity: 1.056 (style range: 1.045 – 1.065) Terminal Gravity: 1.011 (style range: 1.010 – 1.018) Colour: 11 EBC (style range: 43.5 – 79, but this is for a ‘black’ version) Alcohol: 7.4% ABV (style range: 4.2% – 5.95%) Bitterness: 37 IBU (style range: 25 – 40)
Mash: 5.0 kg Maris Otter Pale Ale Malt (Warminster) 7 EBC (73.5%) 0.5 kg Munich Malt (Bairds) 9.9 EBC (7.4%) 0.5 kg Rolled Oats (Lidl) 3 EBC (7.4%) 0.5 kg Flaked Barley (Holland & Barrett) 140 EBC (7.4%)
Mash pH 5.6
Boil: 50 g Target Hops (8.0%) – added during boil, boiled 60 min (31 IBU) 25 g Fuggle Hops (4.0%) – added during boil, boiled 20 min (6 IBU) 0.5 Protafloc Tablet (Irish moss) – added during boil, boiled 15 min 0.3 g NBS Yeast Nutrient – added during boil, boiled 10 min 5 g Polyclar BrewBrite (finings)- added during boil, boiled 10 min
Post-boil: 300 g Panela Sugar 26 EBC (4.4%). Pre-dissolved in small amount of the boiling wort and stirred into beer in fermenter before pitching yeast.
Yeast: 1 packet of Imperial A09 Pub (2 litre starter using 200 g dry malt extract, roughly 290 billion yeast cells)
Bottling/kegging stage tincture: 220 g of Roasted Cacao Nibs (Waitrose or Sainsbury’s cooking ingredients) 250 g of Coffee Beans (Lidl’s Italian roast was used) 2 Vanilla pods
All the above soaked separately in just enough vodka to cover for two weeks. In my case, about 1 Litre of cheap vodka was used (again from Lidl). Pour tinctures through strainer into bulk beer.
NOTES / PROCESS
Add 300mg potassium metabisulphite to 43 litres tap water to remove chlorine / chloramine.
Water profile dark and malty: Ca=110, Mg=11, Na=25, SO4=50, Cl=150. SO4/Cl ratio 0.3.
4.0 L/kg mash thickness with no sparge.
Single infusion mash at 68C for 90 mins.
Raise to 77C mashout temperature and hold for 15 mins.
Boil for 60 minutes, adding Protafloc, etc., as per boil schedule. Lid on at boil-out, whirpool with large spoon or paddle and allow to settle. Start chilling immediately.
Whilst wort is boiling, draw off about 500 ml in a plastic jug and dissolve the 300 g of Panela sugar.
Cool the wort quickly to 19C (I use a one-pass convoluted counterflow chiller to quickly lock in hop flavour and aroma) and transfer to fermenter.
Stir previously dissolved Panela sugar mixture into fermenter.
Aerate well. I use pure oxygen from a tank at a rate of 1 litre per minute for 90 seconds.
Pitch yeast and ferment at 19-20C (wort temperature).
After the beer has fermented to near final gravity the beer is raised from fermenting temperature to a higher temperature roughly 1-2 degrees C above the original fermentation temperature and allowed to sit for two to four days for a diacetyl rest. Assume fermentation is done if the gravity does not change over 3 days.
Before packaging you may optionally crash cool to around 6C and rack to a bright tank or bottling/kegging vessel that has been purged with CO2 to avoid oxygen pickup.
Strain the tincture flavourings into the beer, as per the bottling/kegging stage described above.
Package as you would normally. I rack to a cornie keg that has first been purged with CO2, and then carbonate on the low side (around 2.4 volumes of CO2) to minimize carbonic bite and let the flavours shine through. After 1-2 weeks at serving pressure the kegs will be carbonated and ready to serve. If bottling, use 151 g of table sugar in 25 Litres at 20 C. Leave at room temperature for two weeks, then store at cellar temperature for another week before serving.
COMMENTARY WITH PICTURES AND VIDEO
Here’s all the equipment set up ready for the brew. Notice the obligatory cup of tea! If you are wondering about the engine hoist, it’s there to lift the heavy malt tube out prior to boiling the wort.
Before the brewing day starts, I have to make sure that there is sufficient yeast for the fermentation. The best way to do this is with a yeast starter. A yeast starter is simply a fancy way of saying that you’re going to grow more yeast cells. A starter is simply a small unhopped beer, whose sole purpose is to allow the yeast to reproduce. You cultivate this yeast and then throw away the resulting ‘beer’, keeping only the yeast. This is usually done by making a small batch of lower gravity (1.036 – 1.040) wort in a flask by boiling dry malt extract (DME) and allowing it to ferment to completion. Lower gravity is best as it maximizes healthy yeast growth. The more yeast you need, the larger the starter you need. Here’s my 2 litre starter on the stir plate:
Starter at peak fermentation:
When the starter is finished, it needs to be put in the fridge for two or three days for the yeast to settle out. After settling, the unwanted ‘beer’ above the yeast is decanted off. Swirl a little of the wort from the fermenter into it, and tip the lot back into the fermenter (after wort has been oxygenated).
As well as preparing a starter, I have to prepare the tap water to make it suitable for brewing. My tap water alkalinity measured 233 (ppm as CaCO3) on the day of brewing and is far too high. There is no sparge water to treat as this is a non-sparge recipe. However, I do have to treat 43 litres of water for mashing. As the treated water needs to be chloride forward for the beer style, I am using 1M strength Hydrochloric Acid to lower the alkalinity. I used 134 ml of the acid and this gave me a very suitable alkalinity measurement of 33 (ppm as CaCO3). The tap water once treated is now called “liquor”.
Alkalinity Out Of The tap
Alkalinity After Acid Treatment
Here are the milled malt grains and flaked ingredients ready for the mash:
With the grist carefully poured inside the 50L Braumeister malt tube, I start the mashing process. Here’s a video of the wort rising up the malt tube and recirculating by running out of the top plate and down the side of the malt tube:
While waiting for the boil, I weigh the hops ready to add to the boiling wort:
Target & Fuggle Leaf Hops
After the mashing is over, the malt tube is removed and the wort is heated to boiling point.
When the boil is over, I pump the boiled wort into the fermenter via a counter-flow chiller to cool it down to yeast pitching temperature. Here’s a picture of a previous brew showing how it’s done:
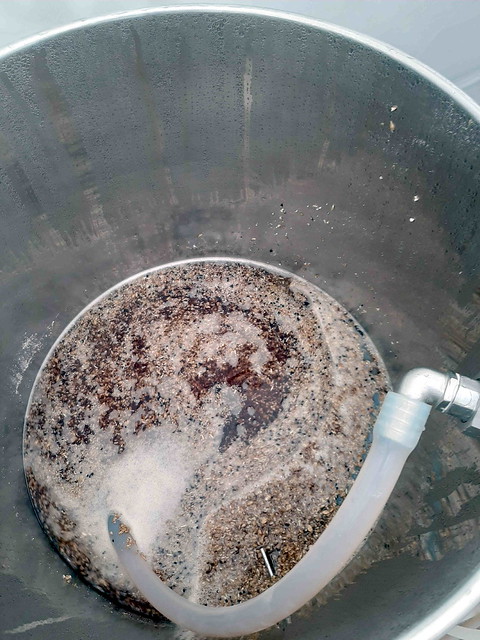
This is what the beer looked like after two days in the fermenter. The A09 yeast is really chomping away at this one!
This is a photo of the beer when fermentation was finished. I’ve not yet crash cooled or added the tinctures, at this stage, but the colour is perfect and the taste – even without the coffee, chocolate and vanilla – is like a very smooth and full bodied amber ale. The hoppiness seems about right as well and is slightly understated as it should be for a oatmeal stout.
And finally, as this beer is a bit of an enigma – being both golden and a stout – I’ve decided that “Enigma” would be a perfect name for it. So here is the bottle label I will be using:
Another successful brewing day over and a welcome increase in my brewing knowledge.
CONCLUSION Some beer drinkers love these new, niche beers, while some couldn’t be bothered. Still others, like yours truly, have yet to come down on one side of the fence or the other. Do they taste good? Indeed they do, and they’re a fun exercise in the creativity of modern brewing techniques. But will they ever supplant their darker brethren? I doubt it. In my experience, while delicious in their own right, golden stouts lack some of the depth of malt complexity that I yearn for in a stout (this makes sense, given that their malt bills are, by definition, simpler). You could even think of golden stouts as coffee blonde ale with chocolate and maybe some lactose-smoothness added. Luckily, I think golden stouts are here to stay. So the next time you feel like taking a walk on the wild side with a mind-bending beer, try a golden stout! Cheers!
What do you do when you can’t get to live beer festivals? Here’s what CAMRA said when I checked out their web site:
JOIN THE GREAT BRITISH BEER FESTIVAL WINTER FROM THE COMFORT OF YOUR HOME!
Unfortunately due to COVID-19, we are unable to host the Great British Beer Festival Winter in Birmingham as planned. However, we still wanted to share with you some of the very best beer, cider and perry the UK has to offer. Join us for the Great British Beer Festival Winter at Home – an interactive, immersive and on-demand virtual festival that you can enjoy where you want, when you want. Included in the price of your ticket is a box of fantastic beers, ciders or perries and a login code for access to a vast array of online content including beer tastings, brewery tours, recipe ideas, industry Q&As, pub history talks and so much more.
Well, anyway, I signed up. Cost me £30 delivered for a box of 6 dark beers and a ticket for the expert tasting session – called the “Highlights of Sheffield Beer Box and Tasting Session”. What with the other online sessions, and money off various festival food selections, it doesn’t seem bad value for money. No travelling expenses or B&B costs either!
Here are pictures of the beers I was sent:
And here are descriptions of the beers from each brewer’s website:
Ballast Porter 4.4%. Stonehouse Brewery, Weston, Shropshire. Smooth, velvety porter balanced with Guatemalan coffee and vanilla.
Victorian Ruby Mild 7.0%. Bottle conditioned. Ashover Brewery, Chesterfield, Derbyshire. A traditional strong mild brewed to a historic recipe. Brewed especially for International Women’s Collaboration Brew Day to promote the efforts of female brewers.
Wildcat Scottish Style Deep Amber 5.1%. Cairngorm Brewery, Scotland. A smooth, deep amber coloured beer with a complex malt, fruit and hop flavour.
Maggs Mild 3.5%. West BerkshireBrewery, Yattenden, Berks. A traditional rich, dark mild with big hitting biscuit malt flavours, a light earth hop aroma and a velvety smooth finish.
Stout Coffin Dark Ale 4.6%. Church End Brewery, Nuneaton, Warks. Black, chewy and creamy. A first class example of what a stout should be.
Mild Concussion 5.5%. Fixed Wheel Brewery, Blackheath, W. Midlands. Our house mild brewed with a plethora of specialty and high dried malts, big toffee and caramel flavour’s on a light malt base, big fruity finish, a beer with layers of flavour yet light and easy drinking, just watch your head with the older style abv.
Some really great beers in the selection and all fine words no doubt, but the truth will be in the tasting. I’m really looking forward to joining the tasting session and other festival sessions over the weekend. Hopefully, ‘virtual’ beer festivals will be temporary and not the ‘new norm’. With a bit of good fortune, real, live beer festivals will return by late summer. Not mixing with other beer drinkers and getting ‘virtually’ imbibed on my own just isn’t the same thing!
INTRODUCTION: In the October CAMRA Bromley Branch e-Newsletter we told how Bob Keaveney’s hops were going to be used in their freshly picked ‘green’ state to make three “Green Hop” seasonal beers. As previously reported, the brewing recipes would be based on the winning entries in the Bromley CAMRA Branch “Green Hop Beer Competition”. The two members who won with their recipe ideas were Stephen Osborn and Murray Mackay. Bob was also given a ‘bye’ into the finalists round as he provided the hops!
Hops freshly picked
Stephen wanted a traditional bitter-style beer that predominantly featured one variety of the hops. Whereas, Murray went to the opposite end of the beer style spectrum and suggested a flavoursome mild using Fuggles. Along with Bob, they also had suggestions for the third recipe, which when combined with my brewer’s input, prompted the design of a strong pale ale. So the three beers brewed with the Cascade, Fuggles and Target green hops were: • Green Hop Special Bitter • Green Hop Cask Mild • Green Hop English IPA.
Hops used for brewing are usually quickly dried out under controlled conditions and can keep for up to three or more years if stored correctly. Green hops, however, must be used as quickly as possible after picking, and at the most within 48 hours. Otherwise, the green hops quickly lose their unique fresh flavour and the moisture in the hops can give rise to mould. With speed in mind, the beers were made over three days commencing Monday 7 September.
Picking the hops
Bob came along to help out on the first brewing day and took some photos as well. Grateful thanks to Bob for recording the day as it is very difficult to stir the mash and take photos at the same time. Both Stephen and Murray assisted on the last brew day. Their toil, and the brewer’s, were greatly eased with plenty of beer from the brewery “tap room” as we worked. Brewing can be a long and lonely chore, so from my perspective as the brewer it was nice to have a captive audience to chat to. Besides which, with their hands on the brewery tools as “Assistant Brewer”, I had someone else to blame if it all went wrong!
This brewing write-up will cover the first of the three recipes – the Green Hop Special Bitter suggested by Stephen.
ABOUT HOPS IN GENERAL AND BITTER STYLE BEERS: The modern hop has been developed from a wild plant as ancient as history itself. As far back as the first century AD they were described as a salad plant and are believed to originate from Egypt. The plant itself is actually in the Cannabaceae family, which also produces cannabis. So, when you look at the hop buds, they look very similar to miniature cannabis leaves and almost appear as if someone decided to make marijuana into rabbit food!
Today, the words beer and ale mean much the same, but the word ‘ale’ was originally reserved for brews produced from malt without hops. This was the original drink of the Anglo-Saxons and English, whereas ‘beer’, a brew using hops, probably originated in Germany. Hops were cultivated in the Low Countries (modern Belgium and Holland) from the 13th century.
The cultivation of hops was probably introduced from Flanders to England in the Maidstone area of Kent at the end of the 15th century. Our national drink until then had been ale, unhopped and sometimes flavoured with herbs such as wormwood. English brewers were the last of the Europeans to adopt hops and up until that transition to hops, “gruit” was the option for herbed and spiced beers.
Brewers started to import dried Flemish hops but these contained so much extraneous matter that an Act of Parliament was passed in 1603 imposing penalties on merchants and brewers found dealing in hops adulterated with “leaves, stalks, powder, sand, straw and with loggetts of wood dross”. In those early days, the sole reason for using hops was to preserve the beer in good condition: the bittering effect was thus reluctantly accepted by Englishmen. By the 17th century ale (i.e. un-hopped beer) was no longer popular and bitter-flavoured beer was the established drink.
Around the 1930s and through the second world war, English bitters rose to popularity in England as consumers opted for something other than the common dark-style ales available at the time. Post-WWII, bitter had established itself as a premium product that offered better quality and flavour. During the 20th century, bitter was the most popular type of beer sold on tap in UK pubs; some consider it “the national drink of England.”
English bitters and pale ales are generally a popular choice for people who like more flavour (compared to a light lager) and a slight bitterness from their beer (compared to an IPA), but who aren’t looking for something too extreme, overpowering, sweet, or heavy. The complexity and range of flavour for bitter beers can be broad. A style that has evolved over time, there are both lighter mild versions and stronger, more bold version of the English bitter. When brewed, it is made using top-fermenting ale yeasts. The bitterness from the hops should be less bitter than an India Pale Ale.
Today in the UK, Bitter is not a strictly governed style and beers bearing that appellation might be golden to red, drily bitter or honey-sweet, rich in hop perfume or rather austere. Depending on strength, they might be called “Ordinary,” “Best,” “Special,” or even “Extra Special Bitter (ESB).” It is easier, perhaps, to say what Bitter is not. Once the classy alternative to Mild, then the conservative alternative to trendy lager, it is now the preferred choice of the anti-hipster — it’s not American IPA, and definitely not fruit-infused barrel-aged Saison.
ABOUT THE RECIPE AND INGREDIENTS: The recipe I am using is similar to one I have successfully used before when I brewed a clone of Jennings Cocker Hoop. However, it is modified to take on board the use of green hops and Stephen’s winning suggestions.
Let’s first talk about the hops. Green (wet) hops fresh from the bine contain about 80 percent water, so you need to use more than you would when using dry hops. In general, four to eight times as many wet hops are needed by weight as dry hops. Fresh hops may be used at any point during the brewing process. You can add fresh hops as a boil addition, whirlpool addition, dry hoping, or even in the mash. Fresh hop beers are known for their fresh green aromas. When you adapt a recipe for wet hop brewing, you can savour the difference. Due to their comparative low bitterness, they are best used at the end of the boil, or alternatively in the beer conditioning stage, mainly for aroma only, so normal dry bittering hops should be used at the start of the boil. In this recipe all the hops used are Cascade. The bittering comes from Bob’s Cascade hops that were dried from last year’s harvest, with the fresh green Cascade hops being added at or near the boil end for that beautiful green hop aroma.
Turning to the malts in the recipe, the malt bill is relatively simple consisting of Pale Malt, Munich Malt, Torrified Wheat, and a small amount of Black Malt.
The Pale Malt after the mash tun conversion process supplies the bulk of the fermenting sugars and gives both colour and a sweet biscuit flavour. Munich malt brings rich malty flavours and golden hues to light beers. It is an excellent base malt for Strong Bitter, Dark Amber Ales, Brown Ales and Milds. Munich Malt brings intense colour and malty notes, without compromising enzymic action. Despite its continental name, this malt provides a fantastic malty base for British Ales and Bitters. Torrified wheat is a pre-gelatinized unmalted brewer’s wheat that can be used as a cereal grain/adjunct in the mash, and can replace malted wheat if you desire. It increases body and head retention, as well as adding a very slight toasted flavour. Because it’s not malted, it needs to be mashed with the diastatic pale malt in order to convert the starches to sugars ready for fermentation. The black malt is used in very tiny quantities in this recipe, and is there merely to provide colour to the beer and to give it a slightly crisp edge.
The yeast process I used in this brew was slightly unusual for me. I re-used a slurry of Safale American US-05 yeast left over from a previous fermentation. A couple of days earlier I had brewed an American Double IPA (DIPA). After the DIPA had finished fermenting in it’s conical fermenter, and the beer had been transferred to the conditioning tank, what was left on the bottom was the finished yeast remains. Without cleaning out the fermenter, what I did with the wort of the Special Bitter, after boiling and cooling, was to pitch the new brew straight onto it. Within 3 hours it was going like the clappers. As the fermenting gases blew the through the airlock it sounded like a church organ! Here’s a picture of the slurry waiting to devour the sugars from the Special Bitter wort:
Slurry awaits a feast!
GREEN HOP SPECIAL BITTER RECIPE VITALS: Size: 47.5 Litres (post-boil @ 20C), 42 Litres into fermenter Mash Efficiency: 86 % Attenuation: 80% Calories: 43.5 kcal per 100 ml Original Gravity: 1.047 (style range: 1.048 – 1.060) Terminal Gravity: 1.009 (style range: 1.010 – 1.016) Colour: 16.9 EBC (style range: 15.8 – 35.5) Alcohol: 5.1% ABV (style range: 4.6% – 6.2%) Bitterness: 45 IBU (style range: 30 – 50)
MASH: 6.5 kg Pale Malt (Minch) 5 EBC (84.4 %) 0.75 kg Munich Malt (Bairds) 9.9 EBC (9.7 %) 0.375 kg Torrified Wheat (Crisp) 4 EBC (9.4%) 0.075 kg Black Malt (Crisp) 1300 EBC (0.9%)
Mash pH 5.39
BOIL: 75 min boil 75 g Cascade leaf hops (7.0% alpha) – added during boil, boiled 75 min (20.4 IBU) 200 g Cascade green hops (2.0% alpha) – added during boil, boiled 10 min (8.1 IBU) 300 g Cascade green hops (2% alpha) – added during boil, boiled 5 mins (6.7 IBU) 1 Protafloc Tablet (Irish moss) – added during boil, boiled 15 min 0.5 g Yeast nutrient – added during boil, boiled 12 mins 7.5 g Polyclar BrewBrite – added during boil, boiled 10 min
POST BOIL: 500 g Cascade green hops (2% alpha) – added at end of boil (hopstand for about 10 mins) for aroma (1 IBU).
YEAST: Yeast Slurry SO5 500 ml (387 billion yeast cells)
NOTES/PROCESS:
Add 500mg potassium metabisulphite to 62 litres water to remove chlorine / chloramine.
Water treated with brewing salts for a hoppy flavour profile: Ca=110, Mg=18, Na=16, Cl=50, SO4=275).
2.61 L/kg mash thickness.
Single infusion mash at 66C for 90 mins.
Raise to 76C mashout temperature and hold for 15 mins.
Fly sparge with 40.84 L water with 5.6-5.8 pH (measured at mash temperature). Collect 56.5 litres.
Boil for 75 minutes, adding Protafloc, etc., per schedule. Add hopstand hops at boil end. Start chilling after 15 mins.
Cool the wort quickly to 20C (I use a one-pass convoluted counterflow chiller to quickly lock in hop flavour and aroma) and transfer to fermenter.
Pitch yeast and ferment at 20C (wort temperature).
Before packaging you may optionally crash cool to around 6C and rack to a bright tank that has been purged with CO2 to avoid oxygen pickup. Add 1 tsp of unflavoured gelatine dissolved in a cup of hot distilled water per 19 litres of beer, and allow to clear for 2-3 days.
Package as you would normally. I rack to cornie kegs that have first been purged with CO2, and then carbonate on the low side (around 2 volumes of CO2) to minimize carbonic bite and let the hop and malt flavours shine through. After 1-2 weeks at serving pressure the kegs will be carbonated and ready to serve. Like all hop forward beers this beer is best consumed fresh, so feel free to raise the CO2 pressure temporarily to 30-40 PSI to carbonate fast over a 24 hour period, and then turn back down to serving pressure.
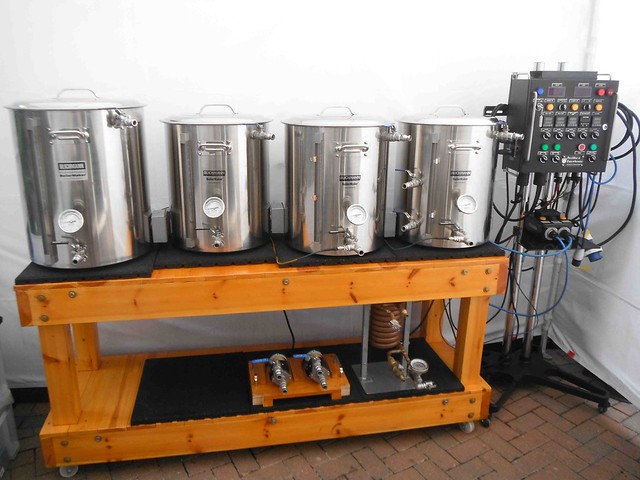
PHOTOS OF THE DAY: Some pictures of the brewing day follow.
The first picture (L to R) shows the boil kettle (BK), the Mash Tun (MT), and the Hot Liquor Tank (HLT). The big black box with knobs is the Control Panel, which controls the process stages and temperatures. The chiller, wort pump, and water pump can be seen below.
Brewing kit all set up
Close up on the Control Panel:
The “Brain”
Setting the mash tun temperature:
Head Brewer at work!
Scooping the grains into the mash tun:
Easy does it!
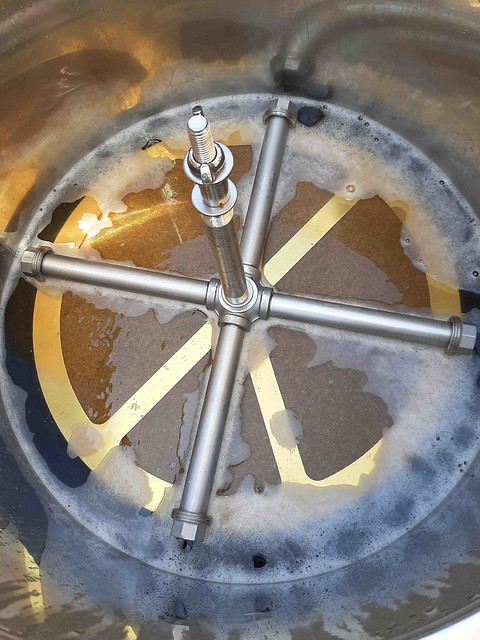
View inside the mash tun showing the recirculation above the grain bed:
Mashing underway
Once the mash is over we start running the wort into the Boil Kettle:
Run-off into boil kettle
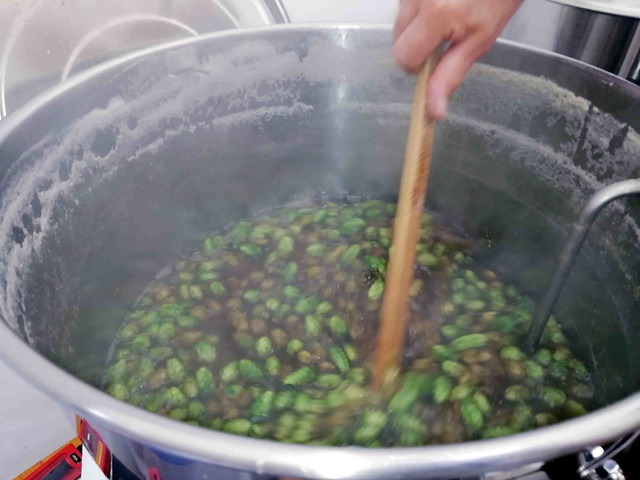
Once the boil is underway we add the green hops:
Green is beautiful!
Stirring in:
Giving it a good stir
Video of the boil underway:
A vigorous boil
After the boil and draining into the fermenter via the chiller, this is the spent hops that are left:
Spent hops
This picture shows the pumps and hoses set up to run the boiled wort through the chiller into the fermenter:
Cooling before pitching the yeast
Finally, the fermenter stored in the cold room next to another fermenting beer so that it doesn’t feel lonely:
Fermenting away
Once the fermentation was finished the beer was packaged into bottles and kegs. Packaged was 1 x 19L & 1 x 12L cornie, 17 x 500ml glass bottles. Total 39.5 L. Specific Gravity at packaging was 1.009, pH was 4.29. After about three weeks the beer can be enjoyed in all its glory!
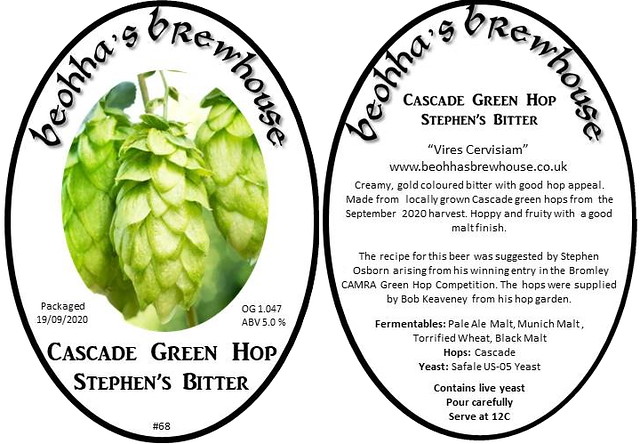
This shows the front and back bottle labels:
Bottle labels
Brewing the green hop beers has been an interesting and challenging experience. Not the least because you have to work with huge amounts of the green hops. Nonetheless it was very enjoyable and I look forward to repeating it next hop-picking season with new recipes. Thanks to Bob for supplying the hops and thanks to Stephen and Murray as the “Assistant Brewers” for their excellent suggestions and help on the brewing days.
(This is an historic post as the competition closed on the 7 September 2020)
INTRODUCTION
Those of you regularly reading the monthly Bromley CAMRA Branch newsletters would have been following the growth of Bob’s hops from planting through to flowering. They will be ready for harvesting in early September, so now is the time for me as the beneficial brewer to think about what beers to make with this magnificent crop. The three hop varieties to be used in the brewing are Fuggles, Target and Cascade.
In our very own local version of CAMRA’s “Brew2You”, we want to get our Branch members involved in how we are going to use these hops, so the hop farmer (Bob) and the brewer (me) thought it would be a good idea to run a competition for the branch members. So what we are inviting you to do is to give us your suggestions on what we should be brewing.
Fresh beer and green hops
The plan is to use the hops in their green state, fresh after picking, and not dry them out for later use, which is the normal procedure. Several factors make fresh hops beers uniquely challenging for brewers. Fresh hops are less concentrated, so it takes more of them to achieve the same flavour as a beer made with dried hops. Fresh hops also provide distinctively grassy, plant-like, and “green” flavour profiles without the extreme bitterness we associate with IPAs and other beers featuring copious dried hops. Additionally, fresh hops expire extremely quickly and need to be used roughly within 48 hours of harvest.
Just to get your brains thinking, let me tell you very briefly about typical beers made from the three hop varieties that Bob has grown.
Fuggles is a very traditional English hop and is used to make classic British ales and milds, giving the beer an earthy and grassy aroma, especially when used both for bittering and aroma. It is also used for porters, lambics and winter seasonals. Well known beers include Blacksheep Best Bitter, White Shield, Shepherd Neame IPA, Fullers IPA, Adnams Broadside, Theakston Old Peculiar and Young’s Special (some combined with other hop varieties).
Target is a more modern English hop with a floral flavour. With its high alpha acid content it is very suitable as a bittering hop, although some brewers also like the hop’s floral notes for dry hopping. Target can be used for almost all beer styles, although it is considered too harsh for light lagers. It is particularly popular as a bittering hop for stouts and porters. Used with discretion in combination with fine aroma hops, however, excellent Bitters and Pale Ales can be produced. Beers made with this include Dark Star Imperial Stout, Fuller’s Imperial IPA, Fullers ESB, Murphys Irish Stout, as well as being often used in Saisons.
Cascade is considered by many the quintessential American Hop and with good reason. It has become an essential hop addition in many American Pale Ales and most West Coast IPAs. Today there are also New Zealand, Argentinian, and Australian varieties of Cascade – as well as found in Bob’s UK garden! A hop with unique floral, spice, and citrus qualities, with the citrus elements often running toward a strong grapefruit character. Here are a few examples of beers with Cascade hops: Anchor Liberty Ale, Sierra Nevada Pale Ale, Dark Star Hop Head, Founders Pale Ale, Kelham Island’s Pale Rider and Adnam’s Ghost Ship.
So get your beer thinking hats on and tell us in one or two short paragraphs what you would like to see brewed. We will probably have enough hops to brew three distinct brews. The brews you suggest can use one, two, or even three of the hop types for really imaginative ideas. All three winners will be given two bottles from the three brewing batches – six in all.
Further more, if you want to, the winners will also be able to come along to one of the brewing sessions and watch the beers being made.
The brewery
Due to the need to use the hops in their freshly picked state, the opening and closing dates for your suggestions will be very tight. The Branch newsletter will be delivered to your email boxes on the 1st of September. The hops will start to be picked, weather permitting, on the 5th of September.
The closing dates for your recommendations will be Monday 7th September and the brewing will start the day after.
INTRODUCTION: A golden pale ale with a creamy white head and malty flavours. You can almost taste the Lake District in this – it’s so fresh and crisp with a slight citrus aftertaste. It’s not too fizzy and leaves a pleasant taste in the mouth but a frown on the face when it is finished!
The original Jennings Cocker Hoop is an award winning golden bitter which won gold in the World’s best beer Awards (European) 2013 and a silver medal at the International Beer Challenge 2014. It has also won the best bitter bronze award at a past CAMRA GBBF.
It’s a bitter beer of great character, appealing to those drinkers who really appreciate their beer and are looking for a traditional English Bitter with a more modern flavour twist.
Cocker Hoop Pump Clip
First launched in 1995 as ‘September Ale’, Jennings Cocker Hoop became hugely popular, particularly with Lake District tourists in summer. The name is derived from ‘Cock-a-Hoop’, an old custom of removing the cock (or spigot) from a barrel and resting it on the hoop of the cask before commencing a drinking bout, but was changed to reflect the brewery’s location on the banks of the River Cocker. The original has an ABV of 4.6%, but mine is a little stronger at 5.6% just to make the brewing of it worthwhile!
The weekend that I brewed the beer had very fine summer weather. It meant that it was a very enjoyable brewing day and I didn’t need to erect my brew-gazebo. Getting the 12 foot by 8 foot gazebo up can sometimes be a PITA, so it was very nice just to pull the brew-bench out and do it all in the open in the patio garden. Once again, I used my 50 litre Braumeister one-pot brewing system, which meant setting up, brewing, cleaning, and taking down was much easier. To provide the hot water for the sparging I used my converted 10 litre Baby Burco tea urn as a Hot Liquor Tank or HLT. Pic of equipment set up and ready to go:
Braumeister and HLT
ABOUT THE RECIPE AND INGREDIENTS: The recipe I am using is one derived from Graham Wheeler in his book “Brew Your Own British Real Ale” 3rd edition 2009. Graham unfortunately passed away in November 2017, but he wrote many great home brewing books that are still readily available. His recipes of well-known commercial beers were based on considerable research. Although simplified for home brewing, they always produce excellent results.
Let’s first talk about the hops. Graham’s recipe and the original Jennings one, calls for the use of Styrian Golding hops and Challenger hops. Styrian Golding, or Savinjski Golding as it is commonly known, goes by a multitude of sometimes confusing aliases. Confusing still is the fact it actually doesn’t come from the Golding variety at all, but is rather the result of the clonal selection of Fuggle, and as such exhibits many Fuggle-like characteristics. It was considered a major crop in the 1930’s in both Styria, a state in Austria, and across the Savinja river in Slovenia (former Yugoslavia). Its staying power has been attributed to its disease resistance, specifically, its resistance to mildew. It is now a world-renowned hop and in high demand. From a brewer’s perspective, Styrian Golding is a lovely aroma hop and exhibits resinous, earthy flavours that are perhaps considered slightly more refined than Fuggle. It has also been described as imparting subtle aromas of white pepper to a brew.
As regards the second specified hop, Challenger, this was released to the public in 1972 after development by Wye College in Kent. Challenger hops were derived from varieties Northern Brewer and German Zattler. It accounted for a significant percentage of the hops grown in the UK during the 1980’s and 1990’s, but not so much now. Challenger features decent bitterness and a floral aroma and as such are considered fine for bittering or for dry hopping. Its flavour is smooth with balanced floral characteristics, some citrus and a dash of spice.
Having spoken about the wonders of the hops I was supposed to use, I have to say I had neither in my inventory! But what I do have is a large stock of Fuggle hops grown locally by a CAMRA friend in his garden, and as they gave rise to the origins of Styrian, they are a perfect substitute.
By way of history, the Fuggle hop originates in England and was first discovered in 1861 in a hop yard owned by George Stace in Kent. Some 14 years later it was officially named and introduced by Richard Fuggle of Benchley in 1875. Similar to a Styrian Golding, is noted for its distinct European aroma and has enjoyed a long, versatile run. At its peak nearly 100 years ago Fuggle was known as a dual-use hop. Today however, as other higher alpha acid varieties have become more prevalent, it’s now more prominently used for its aroma.
Now turning to what I could use instead of Challenger, again my hop friend came to the rescue as I also had a good quantity of Cascade hops from his miniature hop farm. Historically, it was pioneered in the 1950’s by Oregon State University, and was originally developed through open pollination of English variety Fuggle and the Russian variety Serebrianka. It is named after the Cascade mountain range that runs from northern California all the way north to British Columbia, Canada. The hops have since gone on to become one of the most popular American hops of all time. Cascade now represents around 10% of all hops grown in the United States. Released in 1972, it is grown extensively in the New World, as well as to a lesser extent in the UK. When used, it exudes a distinct spicy citrus aroma with hints of grapefruit. It thus has similar characteristics to Challenger in that respect.
Turning to the malts in the recipe, the malt bill is relatively simple consisting of Pale Malt, Torrified Wheat, and a small amount of Black Malt.
The Pale Malt I am using is Minch Hook Head Pale Malt. Minch produces malt from 100% Irish origin 2-row spring barley, exclusively grown in the Ring of Hook Peninsula, Co Wexford. This malt is malted in the Minch Boby Malting plant to achieve a deeper colour and sweet biscuit flavour, and is particularly suited to small-batch craft brewing.
Torrified Wheat has been heat treated (kind of “popped”) to break the cellular structure, allowing for rapid hydration and allows malt enzymes to more completely attack the starches and protein. Torrified Wheat can be used in place of raw wheat in Belgian style Wit-Beers, also very good for adding body and head, especially to English ales. Since it has not been malted, you can’t sub it for malted wheat. Because it’s not malted, it needs to be mashed with diastatic pale malt in order to convert the starches to sugars ready for fermentation.
The black malt is used in very tiny quantities in this recipe, and is there merely to provide colour to the beer. Used in small amounts, a likely very yellow beer can be turned into light amber without affecting the desired malt flavour outcome.
One of the extra fermentables I am using this time in #1 Brewer’s Invert Sugar. Invert Sugar is a brewing adjunct (unmalted source of fermentable extract). It is manufactured by converting sucrose (derived from cane or beet sugar) with either acids or enzymes to produce a mixture of glucose and fructose. It is called invert sugar because the sugar solution before the conversion (called inversion or hydrolysis) rotates the plane of polarized light in one direction and following inversion rotates the solution in the opposite direction. Fructose and glucose are monosaccharides and are rapidly used by brewer’s yeast strains. Liquid invert sugar can be stored at higher solids content than liquid sucrose or sugar, making it easier for brewers to handle. In the UK, where it is widely used, it is usually delivered either as a syrup or in brick-like loaves. Invert sugar can be supplied at different colour levels for use in different beers. For example, “black invert,” with a colour of 500 European Brewery Convention units (EBCs), can be used for brewing stouts. Brewer’s invert sugars can lend beers unique caramel flavours that are particular to many British bitters and other ales. They are delicious to nibble and not surprisingly, you end up picking off little bits to eat before you put the sugar in the boil!
MASH: 5 kg Pale Malt (Minch) 5 EBC (85.5%) 0.55 kg Torrified Wheat (Crisp) 4 EBC (9.4%) 0.05 kg Black Malt (Crisp) 1300 EBC (0.9%)
Mash pH 5.46
BOIL: 90 min boil 60 g Cascade leaf hops (7.0% alpha) – added during boil, boiled 70 min (36 IBU) 250 g Ragus Brewer’s Sugar #1 – added during boil, boiled 20 mins (4.3% of total fermentables) 1 Protafloc Tablet (Irish moss) – added during boil, boiled 15 min 0.27 g Yeast nutrient – added during boil, boiled 10 mins 20 g Fuggle leaf Hops (4%) – added during boil, boiled 10 min (11 IBU)
POST BOIL: 15 g Fuggle leaf Hops (4%) – added immediately after boil for aroma, stirred in and left for 10 mins (1 IBU).
Add 200mg potassium metabisulphite to 45 litres water to remove chlorine / chloramine.
Water treated with brewing salts for a hoppy flavour profile: Ca=110, Mg=18, Na=16, Cl=50, SO4=275).
5 L/kg mash thickness.
Single infusion mash at 66C for 90 mins.
Raise to 76C mashout temperature and hold for 15 mins.
Fly sparge 5.8 L water with 5.6-5.8 pH (measured at mash temperature). Collect 39.79 litres.
Boil for 90 minutes, adding Protafloc, invert sugar, and hops per schedule. Add hopstand hops at boil end. Start chilling after 15 mins.
Cool the wort quickly to 20C (I use a one-pass convoluted counterflow chiller to quickly lock in hop flavour and aroma) and transfer to fermenter.
Aerate well. I use pure oxygen from a tank at a rate of 1 litre per minute for 90 seconds per 19 litres.
Pitch yeast and ferment at 20C (wort temperature).
Before packaging you may optionally crash cool to around 6C and rack to a bright tank that has been purged with CO2 to avoid oxygen pickup. Add 1 tsp of unflavoured gelatine dissolved in a cup of hot distilled water per 19 litres of beer, and allow to clear for 2-3 days.
Package as you would normally. I rack to cornie kegs that have first been purged with CO2, and then carbonate on the low side (around 2 volumes of CO2) to minimize carbonic bite and let the hop and malt flavours shine through. After 1-2 weeks at serving pressure the kegs will be carbonated and ready to serve. Like all hop forward beers this beer is best consumed fresh, so feel free to raise the CO2 pressure temporarily to 30-40 PSI to carbonate fast over a 24 hour period, and then turn back down to serving pressure.
PHOTOS OF THE DAY: Some pictures of the brewing day follow.
Samples of the grains before milling and the bulk after:
Left: Pale malt; Centre: Black malt; Right: Torrified barley
Milled grains ready for mashing
The mash process underway in the Braumeister:
Mashing the grains in the malt tube
The hops ready weighed for the boil:
Fuggles & Cascade hops
Vigorous boil underway:
Boiling away
This is what a lump of the invert sugar looks like:
No. 1 Invert sugar
Half-way through, I stopped for lunch with a wheat beer and freshly baked homemade focaccia bread filled with Italian cheese. My dog was eager to get a bite!
Giv’us a bit!
After the boil, the wort is cooled down to 20C for the fermenter:
Hitting the right temperature for cooling
The hops left in the Braumeister after the boil:
Draing the last bit of wort off the hops
Transfer into the fermenter via the counter flow chiller:
Wort transfer
Here’s a view of the yeast working away in the fermenter after three days:
Yeast munching away at sugars
After crash cooling and clearing, this is what the beer looked like before packaging. The colour was just about perfect:
Here comes the sun!
When the beer was finally packaged I had 1 x 18L cornie and 12 x 500ml bottles. Total 24L. This shows the front and back bottle labels:
Front & back labels
Whether the original meaning of ‘cock-a-hoop’ was ‘turn on the taps, let the liquor flow and cast off all restraint’ or ‘stand on the barrel and crow with exaltation’ (or something else entirely) we aren’t ever likely to now know. Suffice it to say, if you come up with and publish a theory of your own, someone will believe it. Meanwhile, all I can say is that my clone turned out really delicious. Drinking it takes me right back to my long hikes in the Lake District and the glorious pints I have had with good friends there.
Today is our wedding anniversary, the 50th or Golden, and my wife and I started the day in style with smoked salmon and champagne.
Tonight we are dining with our family to celebrate.
Just to amuse you, here is a picture of Jan and I at our wedding all those years ago outside Poplar Town Hall in London’s East End. My wife is as gorgeous today as she was then. As for my thick black hair, I still have a little, but not where I can show you!
Thanks to everyone who has wished us well and sent us presents.
Now for the next 50 years!
And here’s a picture taken today of us enjoying ourselves.
Can’t quite work out why my wife looks 20 years younger than me!